HD Install Preparation
For normal use we recommend ext4; it is the default file system for aptosid and is well maintained.
Before installation please remove all usb-sticks, cameras, etc. Installation to USB Devices requires additional steps. You can edit the installer file: ~/.sidconf, and thereby use a different filesystem or spread your installation over different partitions. For example a separate /home.
It is highly recommended that you have a separate data partition. The benefits in terms of disaster recovery, stability of your data are unmeasurable.
Therefore your $HOME becomes a place where basic application configurations are kept. or to put it another way, a container for applications to store their settings.
Re-installing applications to rebuild or duplicate to another computer
To make a list of your installed applications so you can duplicate the installed base on another machine, or perhaps you are for some reason, reinstalling on your current PC, in a konsole
dpkg -l|awk '/^ii/{ print $2 }'|grep -v -e ^lib -e -dev -e $(uname -r) >/home/username/installed.txt
Then copy the text file to a usb key or any other removable media of your choice.
On the new machine copy the text file to $HOME and use the list as a reference to install your required applications.
RAM and Swap
On PC's with less than 512 MB RAM you must have a swap-partition. The size should not be less than 128 mb (cfdisk-output should not be trusted either as it calculates with a 10-base), more than 1 GB swap is seldom reasonable, except if you are copying large data files, like copying CD/DVD data on-the-fly, and/or you need suspend-to-disk/hibernate and server systems. If this is your case, allocate 2 GIG swap, as a minimum.
Please see: Partitioning your HD
ALWAYS BACK-UP YOUR DATA including your bookmarks and emails! See Back-Up with rdiff and Back-Up with rsync. Another option is sbackup (needs installing).
Installation to the hard drive is much more comfortable and lots faster than running a system off a live-CD.
First, you need to set your boot order in the BIOS to CD-ROM. With most computers you can get to the Bios-setup by pressing [del] key while booting (with some BIOS-Versions you can simply choose the boot device while booting, with AMI-BIOS, e.g., with F11 or F8).
aptosid should boot up now in most cases. If that's not the case, you can use Boot-options, (called cheatcodes) which can be issued in the boot manager. Using boot parameters (e.g. for screen resolution or language selection) can save a lot of time with the post-install configuration. Also see Cheatcodes and VGA Resolutions
(U)EFI booting
The bootloader will be an EFI program installed to /boot/efi/EFI/debian/grubx64.efi within your EFI system partition and mounted below /boot/efi/ on your installed system, provided the following conditions are met:
- The motherboard needs to have EFI firmware with EFI booting enabled.
- A current aptosid-amd64.iso
- Booted using UEFI and this is apparent from the plain white/blue grub2 menu, instead of the usual graphical boot menu provided by isolinux for BIOS booting, on the live medium.
- You have a GPT disk with an EFI System Partition (type EF00). This must be vfat or FAT formatted.
- The install target is not a USB disk. If you need to boot a USB stick see UEFI bootable removable devices.
UEFI bootable removable devices
In order to create a UEFI bootable device, such as a USB stick, the contents of the aptosid ISO can be extracted to a vfat formatted partition and the partition marked as bootable.
Optionally this removable medium can also be made compatible with PC-BIOS booting by installing a traditional boot sector in addition to the EFI boot loader (assuming /dev/sdz1 to be the target partition on the USB stick).
syslinux -i -d /boot/isolinux /dev/sdz1
install-mbr /dev/sdz
UEFI Secure Boot
aptosid does not currently support UEFI Secure Boot. The current intention is to wait to see how Debian will handle UEFI Secure Boot before deciding the best course of action for aptosid.
In order to allow dual/triple/quadruple booting of aptosid with other operating systems, UEFI Secure Boot needs to be disabled in the system firmware. The board firmware should offer a boot menu, although on some boards this may mean you need to boot into the MS OS Win 8 and cycle through various menus to turn off UEFI Secure Boot and then reboot.
Rod Smith of rodsbooks.com provides a good insight on the subject of Secure Boot: Managing EFI Boot Loaders for Linux: Dealing with Secure Boot.
Partitioning GPT and UEFI disks
For partitioning GPT and UEFI disks consult: Partitioning with gdisk for GPT disks.
Choosing the language for your installation
Language Installs with KDE-full
Select your main language from the grub menu (F4) in the kde-full release, to install the localisations for the desktop and many applications while booting.
This ensures they are also present after installing aptosid, while only installing the required languages for the given system. The amount of memory required for this feature depends on the language and aptosid may refuse to install the given language packs automatically with insufficient RAM and the boot sequence will be continued in English language but with the desired locales settings (currency, date and time format, keyboard charsets). 1 GB memory or more should be safe for all supported languages, which are:
Default - Deutsch (German)
Default - English (English-US)
*Čeština (Czech)
*Dansk (Danish)
*Español (Spanish)
*English (GB)
*Français (French)
*Italiano (Italian)
*Nihongo (Japanese)
*Nederlands (Dutch)
*Polski (Polish)
*Português (Portuguese BR and PT)
*Română (Romanian)
*Русский (Russian)
*Українська (Ukrainian)
The language selection depends on the availability of aptosid-manual translations, get involved to add your language.
Other Language installs with KDE-lite
- Select your main language from the gfxboot menu (F4). (See also aptosid specific Live-CD Cheatcodes). The Language files themselves are not on the Live-CD so the system will fall back to default English. However, this will make the correct language configuration needed for your preferred language and therefore no need to make any changes into the system, aside from the installation of the missing language files.
- Start the installation.
- Install to HD and reboot.
- After HD install, install the language of your choice and applications via apt-get.
First Time boot up to the HD
After booting up for the first time you will discover that aptosid has forgotten its network configuration. The network can be comfortably set up from Kmenu > Internet > Ceni. For additional WIFI/WLAN roaming please read this.
The aptosid-Installer
1. The Installer is started from the Desktop icon, the KMenu> System>aptosid-installer, or via the konsole using:
su
install-gui.bash
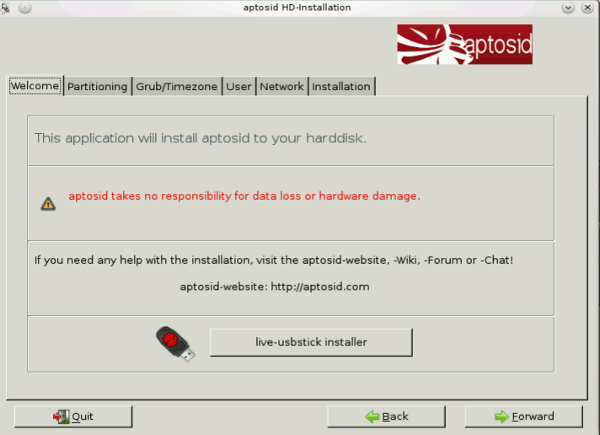
2. After reading (and understanding) the warning text we move on to choosing a partition.
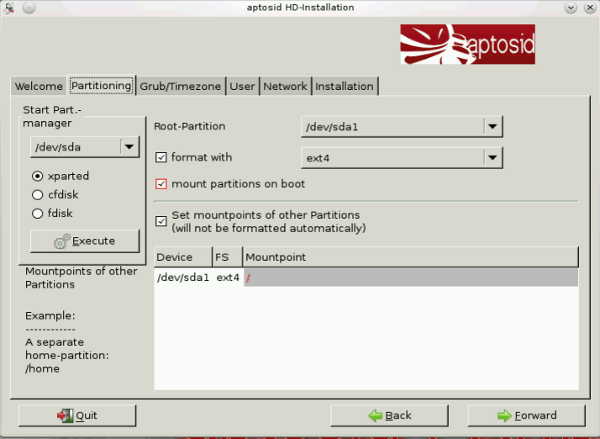
Now choose where the installation is supposed to go to and we establish the mount points. Partitions which you do not establish mount points for, will be auto mounted (the swap partition will always be automatically mounted, when the system starts).
NOTE: If you have your root partition ('/") formatted with your preferred file system, you can uncheck the "format with" checkbox, provided that the drop box reflects the file system of your choice.
All other partitions will be placed as a /media/ partition. Here you have to select the root partition ("/") for your aptosid installation. However, it is at this moment you can also choose to create a data partition. A 'left-click' will activate your choices for each partition.
Have you backed up your data?
If you haven't partitioned your hard drive yet, click on the Execute button in the Start Part.-manager panel, also have a look at Partitioning your HD using Gparted or, if you want to use the shell, read Partitioning your HD
You may also start them from the konsole/terminal
su-to-root -X -c gparted
or
su
cfdisk
3. As a boot manager aptosid uses GRUB, therefore install Grub to MBR! If you make a different choice here, you should know what you are doing. You would have to edit other bootmanagers manually, if you want to keep them.
Grub recognizes other installed OS's (e.g. Windows) and adds them to the boot menu.
Moreover you are able to change the timezone in this window.
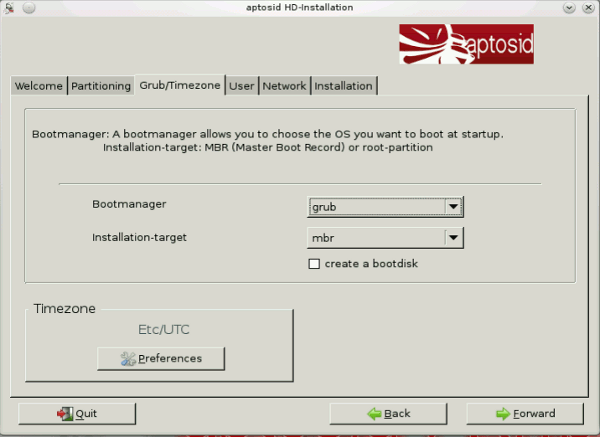
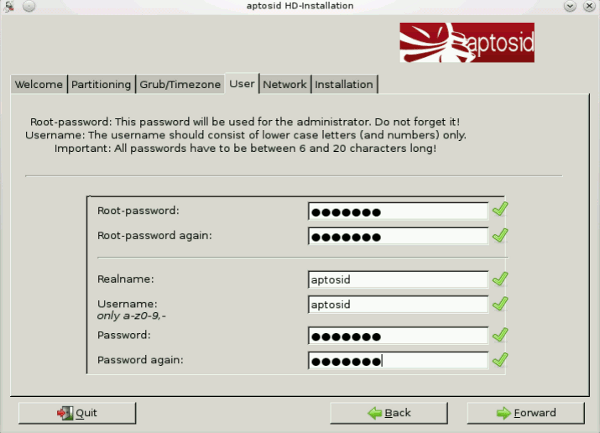
4. On we go with user, his/her password and the root-password (remember those!). Please don't choose too easily-guessed passwords. To add additional users, do so after installation via the terminal with adduser..
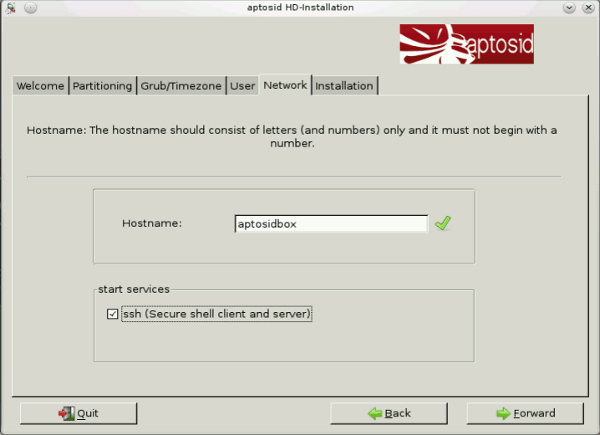
5. Now choose the name of the Installation (you can name it anything you wish, provided that the 'Hostname: The hostname should consist of letters (and numbers) only and it must not begin with a number'.
After that you can choose whether ssh shall start automatically or not.
6. This query is the last chance to check the adjustments you made. Read through it again carefully, then click Save Config and Next..
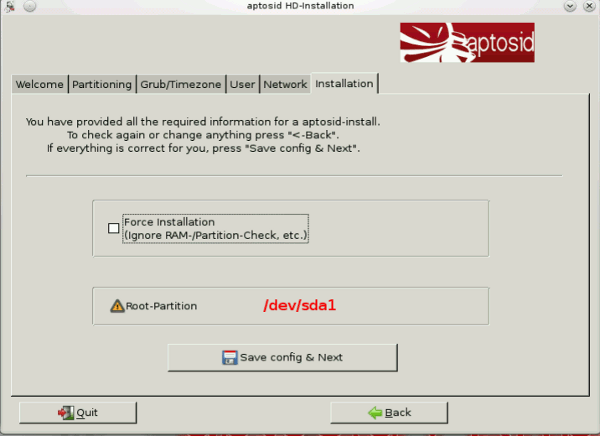
At this point it is possible to change/edit the config file and then start the install procedure with the changed configuration. The installer does not make any checks and you must not click the 'back' on the installer otherwise the changes entered manually will be lost.
Editing (~/.sidconf) is for experienced linux-users, who want to write their special changes to the config-file or have a special partitioning scheme on their hard drive that would be rejected by the automatic check of the installer.
Should the installer detect that you are trying to install over an old $HOME it will warn you and will not let you proceed with the installation until you choose another user name.
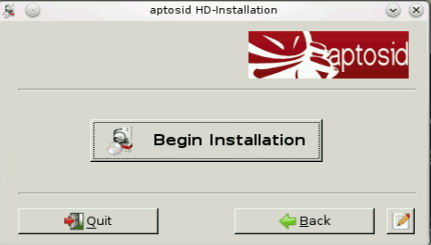
To commence the installation click on Begin Installation The whole process takes, depending on your system, between 5 - 15 minutes, on older PCs it may take as long as 60 minutes..
If the progress bar hangs in one place for a while, don't abort, just give it some time.
Finished! Take the CD out of the tray. Now reboot to your new HD Install.
First Bootup
After booting up for the first time you will discover that aptosid has forgotten its network-configuration. So you have to reconfigure your network (Wlan, Modem, ISDN,...).
Whomever previously had their network address automatically (DHCP) detected by using a DSL-Router must reactivate it with:
ceni
The appropriate tools are still to be found in the Kmenu >Internet> ceni. Also refer to: Internet and Networking
To add an existing aptosid $home partition to new installation fstab needs to be altered, refer to Moving /home.
Do not use or share an existing $home from another distribution as the $home configuration files in a home directory will conflict if you share the same username between differing distributions.
To add users to your installation
To add a new user with automatic group permissions granted, as root:
adduser <newuser>
Just press enter, it should take care of the complexities. You will get asked to type in the password twice.
aptosid specific icons (like the manual and IRC icons) need adding manually.
To delete a user
deluser <user>
Read
man adduser
man deluser
kuser can create new user as well, however you will need to manually adjust the group permissions for that user.
About su-to-root -X -c <application>
Numerous commands need to be run with root privileges. To achieve this you type:
su
While the common command for becoming root is 'su' using su-to-root -X -c <application> instead will allow you run GUI / X11 applications from the command line and allow root to start graphical applications.
Refer to About Xapps whilst in X as root
Some KDE applications require dbus-launch in front of the application:
dbus-launch <Application>
An example of running an X11 app via su-to-root -X -c is to use a text editor to edit a root file like kwrite or kate, to do partitioning with gparted or an Xapp file manager like konqueror. You can also alter root files by right clicking the file and choosing 'edit-as-root', and entering your root password, this will call kdesu in the background.
Unlike 'sudo', it means that someone can't just come along and type 'sudo' and make potentially damaging changes to your system.
WARNING: While you are logged in as root, the system will not stop you from doing potentially dangerous things like deleting important files etc., you have to be absolutely sure about what you are doing, because it's very possible to seriously harm your system.
Under no circumstances should you be as root in the console/terminal to run applications that a standard user uses to go about being productive on a day to day basis, like sending emails, creating spreadsheets or surfing the internet and so forth.

 Search online - offline

