Partitioning your HD using Gparted/KDE Partition Manager
WARNING: for disk naming Please refer to UUID, Partition Labelling and fstab, as by default aptosid uses UUID
On a Live-ISO a password is not set. Therefore use sudo then press 'enter'. See: Live Mode
Resizing the NTFS partition requires you to reboot the system immediately! DON'T DO any other operations on this partition before the reboot, otherwise you will get errors. Please read this.
Always back-up your data!
Basics
A partition must have a filesystem. Linux knows different filesystems to use. Ext4 is the recommended format for aptosid. ext2 is handy as a storage format as an MS Windows™ driver is available for data-swapping. Ext2 Installable File System For MS Windows.
For normal use we recommend the ext4 file system, it is the default file system for aptosid .
Using KDE Partition Manager & Gparted
Creating and managing partitions is not something that is typically done every day. Therefore, a good idea is to read this guide once, to get comfortable with the concepts and some of the panels that will appear. The following assumes that you are using a live-iso . Should you be hard disk installed <sudo> will not work, refer to About Xapps whilst in X as root .
KDE Partition Manager, if installed on the live-iso - run in a terminal:
sudo partitionmanager
Gparted, if installed on the live-so - run in a terminal:
sudo gparted
Gparted will you let create and see GPT disks.
If you need to partition a USB drive, (or SD and SDXC cards), whilst hard disk installed you will need to be root. Refer to About Xapps whilst in X as root else use the commandline tools cfdisk or gdisk.
-
When GParted or KDE Partition Manager runs , a window is opened, and drives are scanned.
In KDE Partition Manager the drives are shown in a list on the left.
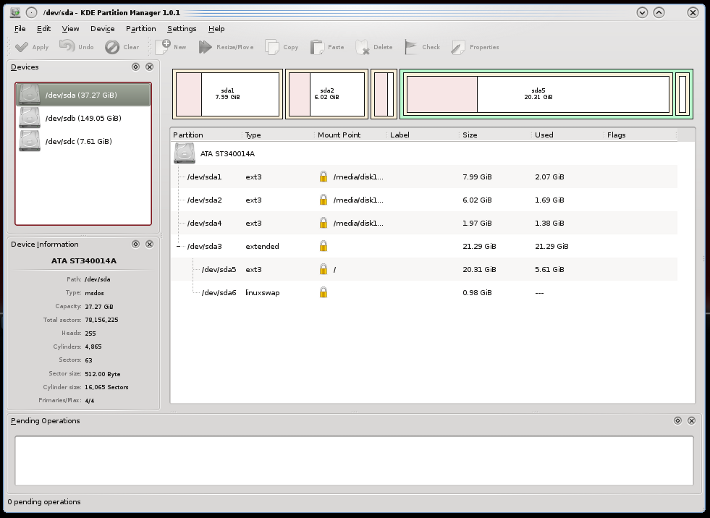
In Gparted, if you click the menu (at the top left), a pop down is presented. You can select to refresh the display of the drives on your system.
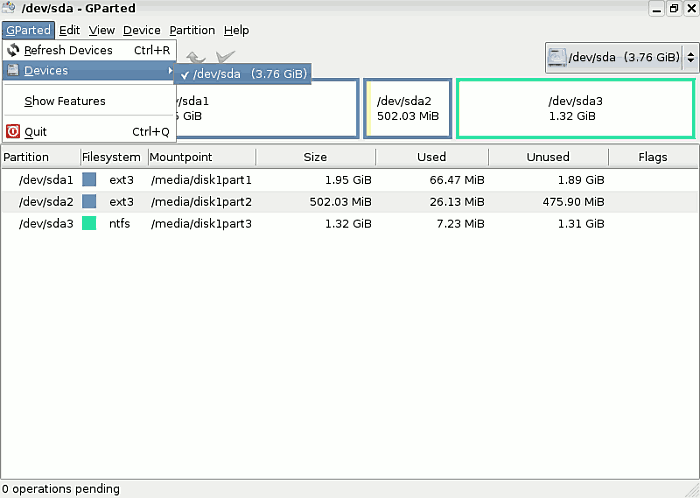
The following screenshots are of Gparted. KDE Partition Manager behaves in much the same manner.
-
Edit
The Edit menu has three greyed out functions which may be crucial for you:
Undo last operations
Apply
Clear all operations. -
View
-
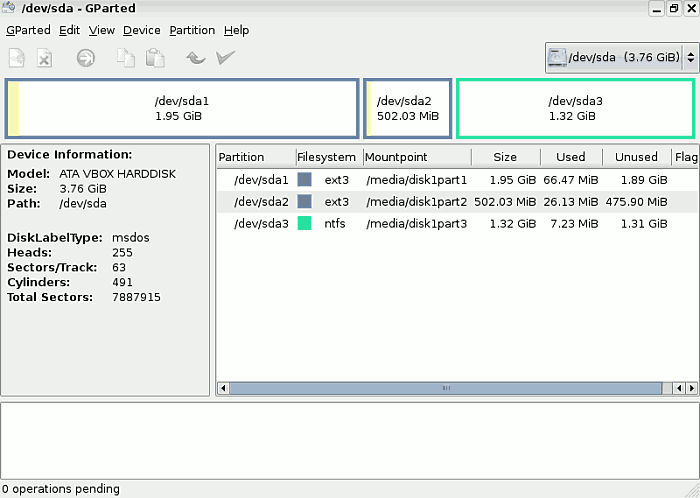
Device Information
The Harddisk Information panel displays details about the hard disk, such as Model, Size etc. This panel is most useful in a multi harddisk system, where the information is used to confirm that the hard disk being examined is the one that is wanted.
-
Pending Operations
At the footing window is a list of pending operations. The information is useful as it provides an indication of a number of pending operations.
-
-
Device
Device allows you to Set a Disk label if the current disk label is inappropriate, you may change it using this option.
-
Partition Menu
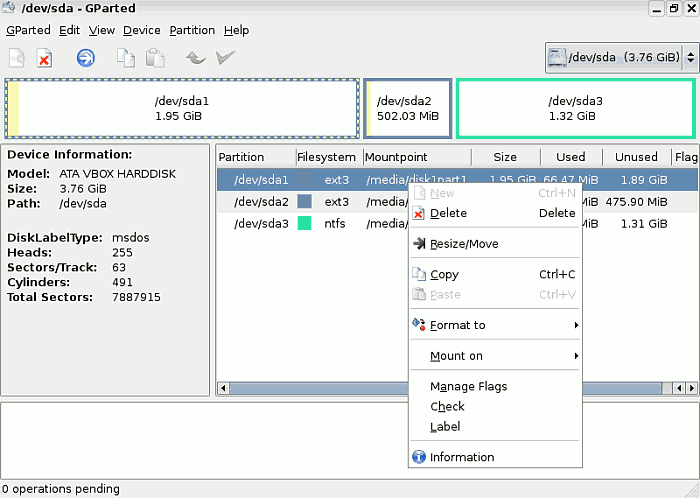
The menu is of utmost importance. It allows you to do multiple operations, some of which are dangerous.
Delete is selected if you want to delete a partition. To perform the delete, you must first select the partition.
Resize/Move allows you to rezize partitions.
-
Creating a new partition
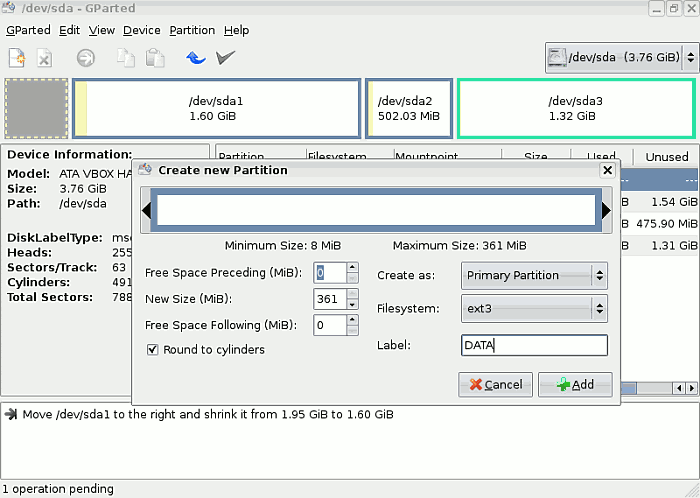
On the graphical toolbar, the New button allows you to create a new partition, if you have already selected an unallocated area. A new window appears and lets you chose the size you want, whether it be a Primary, Extended or Logical partition and the file system.
-
If you make a mistake
If you have made a mistake you can use the Delete button to delete the chosen partition or if you haven't applied your decision to go ahead you can use the undo button.
-
Resizing/Move
When you want to resize a partition you have selected, click Resize/Move button: a new window pops up. Use the mouse to reduce (or grow) the partition or if you prefer, use the arrows.
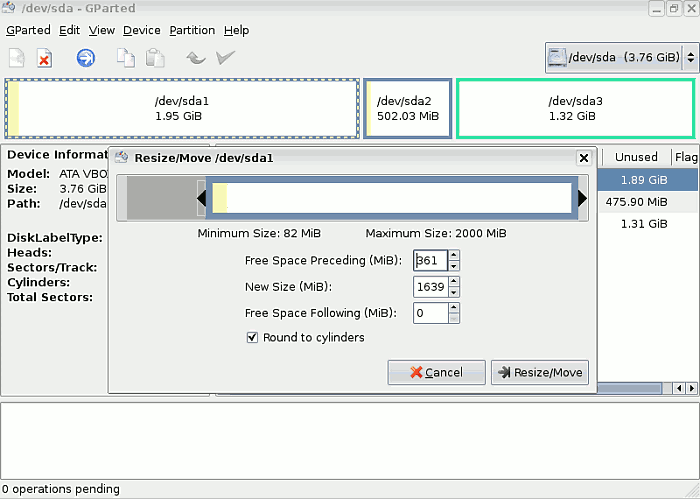
After the Resize command has been given, click on Apply as no operations are given to the hard disk until you click Apply
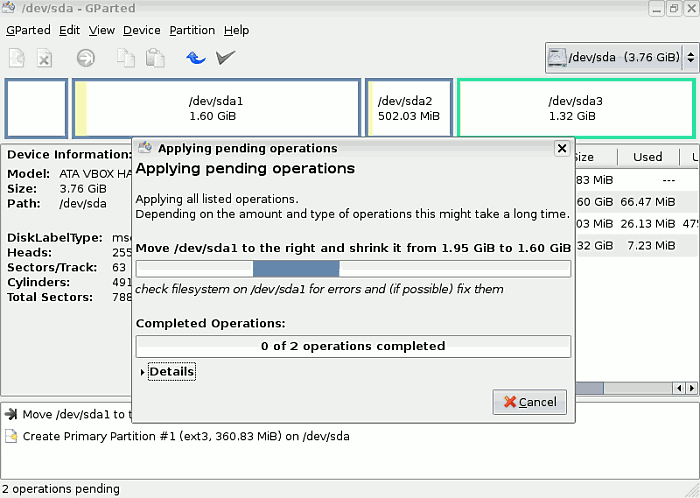
The duration of the operations depends on the new size of the Partition.
After manipulating the partition table please log out and reboot your system to allow aptosid to reread the new partition table.
NTFS partition Resizing
Resizing the NTFS partition requires you to reboot the system immediately! DON'T DO any other operations on this partition before the reboot, otherwise you will get errors.
- After the boot-up on MS Windows™ the system will show a special screen, and a message asking about drive consistency : Checking file system on c :
- Let the AUTOCHK run: NT needs to check its file system after the resize operation.
- At the end of the process, the computer will automatically restart for the second time. This ensures that things run perfectly.
- After restart, Windows XP will be okay, but you must let the system finish the boot and wait for the login screen!
Full GParted documentation: To read the full documentation including, How-To copy partitions please go to GParted
Writing to NTFS partitions with ntfs-3g
Be warned: Whilst the ntfs-3g is stated to be 'stable', never use it without external backup, and of course not on production systems! If you do, it's your fault if your data gets lost, so use at your own risk!
Open a shell and enter the following commands:See Partitioning your HD - Disk Naming
su
apt-get update && apt-get install ntfs-3g
umount /media/xdxx
mount -t ntfs-3g /dev/disk/by-uuid/xxyyzz[etc] /media/xdxx
To get out of the konsole type: exit
An example to add ntfs to /etc/fstab after installing ntfg-3g for a permanent mount point is :
UUID=486E97C46E97A8E8 /media/disk3part1 ntfs defaults 0 0
Now your NTFS Volume should be mounted rw and you should be able to store data on it. But again, be warned! It is not recommended for use on a daily basis.
exfat
exfat is a proprietary file system covered by patents held by Microsoft ™ and commonly found on SDXC cards. To mount/read/write to the file system, simply install the exfat-fuse package:
apt-get update && apt-get install exfat-fuse

 Search online - offline

